Hop on the Shuttle and join me in Adventures in weaving!

Wednesday, June 23, 2010

Dyeing with Indigo

Today I started a new project using Indigo crystals.

I am going to do a Ikat scarf out of 8/2 Tencel. I made 6 bundles of 40 end sections. Then I used  the Fibonacci system to create the patterns I was going to dye each bundle. I started out with the first bundle all white. The next bundle I wrapped all but 2, 2 inch sections 2 inches apart. Then , I wrapped all but 3, 3 inch sections 3 inches apart. The next 3 sections I did the same thing only I wrapped the sections I want to stay white and left the rest to be dyed indigo blue

.turtle 001


Now all the yarn is all counted out and wrapped so Im off to the dye bath. This stuff is crazy. It looks like some weird foamy sludge.  When you put your yarn in and pull it out it comes out a sorta lime green color for about 15 seconds,  then rather quickly it begins to turn a beautiful indigo blue. I LOVE IT.  Here are some pictures…

indigo 001

Does that look gross or what?

I wrapped the warp with garbage bags cut in 1 1/2 inch strips.

indigo 002


indigo fix

Here is what it looked like after I rinsed it out. Sorry about the blurrindigo 005

Monday, June 21, 2010

Batik Turtle Pillow

Right after I learned how to dye fibers and fabric, I decided to order some dyes of my own. Dharma Trading company has a really cool web site with “how to” video’s and a bus load of instructions on different techniques. While I was in a clicking stupor, I came across the section on Batik. I found it very interesting and of course had to order the starter kit.  Sooo, here is the results of my beginner Batik kit.

adventures in weaving 213

Here is the beginning of my turtle. The tool you see here is called a Tjanting. You first melt wax in a melting pot, then dip the Tjanting in the wax and fill the reservoir. With this tool you can apply wax in a fine line (with some practice).

adventures in weaving 216 

adventures in weaving 219

adventures in weaving 220

Moving right along…

adventures in weaving 222

vat dyed

adventures in weaving 224

After that was cured, I had to use a iron and paper towels to get all the wax out of the fabric.

Next I sewed all the beads on to give it a little bling, then I made it into a pillow.

VIOLA! A turtle pillow.


 turtle 006

turtle 010

 turtle 016

turtle 017

Tomorrow I will give this cute little turtle pillow to a very special friend of mine. I hope she likes it.

Monday, June 14, 2010

Woven Shibori Scarf’s Done

Here is the results of my latest woven shibori scarf’s. hb


hbuc

df

dfuc gf

gfuc

twill


I'm still experimenting with the Zebra design.

Saturday, May 15, 2010

Table Runner

Today I started a Table runner for my Niece’s birthday. I'm using a 5/2 cotton perle 12 epi in a 12 dent reed. It is 22” wide and 80” long with 3” of fringe and beads at each end.The other day I was browsing through some of my favorite blogs and came across a draft that I found on Susan Harvey’s blog “Thrums” at http://weeverwoman.blogspot.com/  that was made into some beautiful scarf’s that had a iridescence look. I fell in love with the draft and made some changes to suit what I needed it to look like and size.  Here is a picture of the yarns I am using. The warp is the darker Gold color and the weft is the creamy Gold color. Also, I am practicing taking pictures of my textiles so I can have some experience  before the Escondido Art Partnership show. You have to send in pictures of the items you want them to consider for the show on disk. I want the photo’s to capture the textile color and workmanship. 

   weaving adventures 008

So here is a picture as I was weaving it.weaving adventures 001

I have finished the table runner just a few hours ago. I sewed on 960 beads between the two ends. Tomorrow I will wet finish and hard press just in time to give it to my Niece on her birthday Saturday! I hope she likes it!

Okay, so I have wet finished and hard pressed the Table runner and here is a couple of picturesadventures in weaving 006

That weird reflection on the table is from the window blinds.

adventures in weaving 007

adventures in weaving 010

Thanks Susan for sharing your draft, I hope I did you proud.

Here is a picture I took after I washed the table runner and hung it out to dry…


 adventures in weaving 002

You can see how light and airy it is.

Then I got distracted and took some pictures of flowers in the backyard

adventures in weaving 004

Lavender mmmmmm smells so pretty!

adventures in weaving 005

My Mom calls these Garlic plants. Im sure she is right but they don’t smell like garlic. OK BACK TO WORK :)

Here is the table runners new home. My Niece was sweet and put it on her table right away. It matched perfectly and fit the table whew!!!

weaving adventures 007

Thursday, May 13, 2010

Shibori scarf

I have started on the next Shibori scarf. I am planning on making the Goldfish scarf with the stencil I made as well as the Dragon fly design. I am going to use all the lessons I learned from the first time I did them. I am using a blooming leaf over shot for the Shibori portion.

adventures in weaving 017

I want to do my very best work here because I am going to try to get my scarf’s accepted for a Juried Art show in Escondido. The show is being hosted by Escondido Arts Partnership and is being held at the Escondido Municipal Gallery. The show will be September 1 – October 1 2010. I hope that my work will be good enough to at least be in the exhibit.

UPDATE: I have finished weaving the Shibori scarf’s for the Goldfish and Dragonfly design.

The next scarf I decided to try something new. This time I put the gathering threads in the warp and the weave structure is a plain weave on a straight draw threading. I plan on gathering the fabric then direct dye in a blue color. Afterwards, I am going to stencil a hummingbird and flowers on the scarf in a deep shade of blue, almost black.

weaving adventures 012

Then, I moved over to my Loomcraft 8  shaft. I am having the hardest time trying to decide what design to use for the Zebra scarf. Sooooo, I am going to try this idea. I am making solid squares or windows if you will, that I will paint Nemo’s stripes on.  The squares are positioned with one in the middle, one on the left then the right and repeat till finished.  Also, I am weaving 10 picks between each pattern pick. I'm still not certain what colors I am going to use. The emails I have received so far points toward Pinks, purples, and plum colors. I will use a direct dye application on the gathered portions and sort of feather the color around the squares. After that is finished, I will then paint the stripes in the squares. I plan on having a dye weekend to complete all the scarf's for the Guild fashion show on Monday the 14th of June.

weaving adventures 017

weaving adventures 019

This scarf I used an advancing twill on  8 shafts. I am thinking about using a lime green and lavender in a zigzag dye application, followed by gathering and over dying with a Navy blue. I will bake it in the dryer to set the pleats for added texture and see how it turns out.  

weaving adventures 016

weaving adventures 015

More on this after this weekend :) Keep your fingers crossed!

JUNE 9th

Now that all the scarf’s have been woven, now comes the dye planning. This is where I plan out the design in detail.

Here you can see that I have copied my stencil and placed them on the scarf to get an Idea of how I will paint the images on the fabric. 

bird


hummingbird

Now on to the stencil making for the Zebra scarf,

Here I took pictures of Nemo then I cropped the picture to capture a specific area. After that I traced the image onto stencil material. I cut out the dark areas to make the stencil.weaving adventures 010 

weaving adventures 006

I used a marker to color in the areas I cut out to test the stencil

weaving adventures 007

weaving adventures 008

weaving adventures 009 

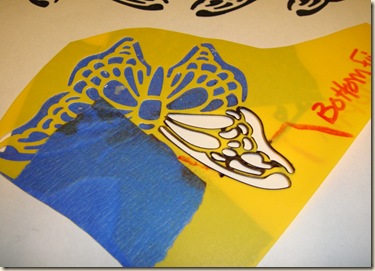
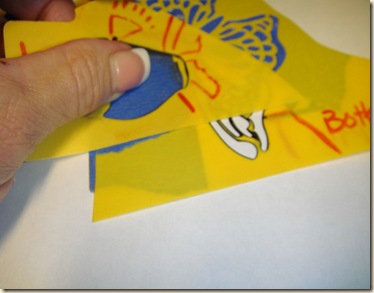
Next, I made the stencil for the Goldfish scarf. I made the body then I saw a butterfly stencil I had for years and thought “I think I can use this for the fish tail and fins”. So I did!

weaving adventures 015

weaving adventures 016

weaving adventures 017 weaving adventures 018

weaving adventures 019

weaving adventures 020

weaving adventures 021


Here is what it looks like when all the pieces are put together.

Next, I will place copies of the fish on the scarf  and then it is time to paint and dye!